Mr. Coffee Iced Coffee Maker
INTRODUCTION
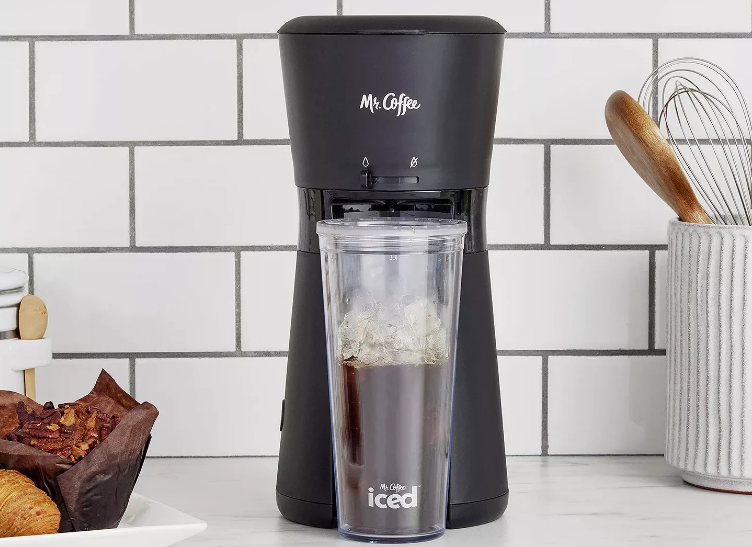
Hello! Welcome to the Mr. Coffee Product Family and congratulations on the purchase of your new Mr. Coffee Iced Coffeemaker. Your iced coffeemaker will make it easy to create refreshing iced coffee in minutes. This machine uses RapidChill™ brewing to quickly cool hot concentrated coffee over ice, leaving you with flavorful iced coffee that’s never watered down. Tumbler (included) allows you to enjoy at home or on-the-go. Add in your favorite mix-ins for iced coffee just how you like it! Using your new Mr. Coffee Iced™ Coffeemaker can save you up to $800 per year!
Our number one goal is to give you the best-tasting cup of iced coffee every time. If you have any questions about your new iced coffeemaker, please contact us at 1-800-MR COFFEE (1-800-672-6333) or visit us at www.mrcoffee.com.
IMPORTANT SAFEGUARDS
When using electrical appliances, basic safety precautions should always be followed to reduce the risk of fire, electric shock, and/or injury to persons including the following:
- Read all instructions.
- Do not touch hot surfaces. Use handles or knobs.
- To protect against electric shock, do not place or immerse cord, plugs, or appliance in water or other liquid.
- This appliance is not intended for use by children or by persons with reduced physical, sensory, or mental capabilities, or lack of experience and knowledge. Close supervision is necessary when any appliance is used near children. Children should be supervised to ensure that they do not play with the appliance. Keep the appliance and its cord out of reach of children.
- Unplug from outlet when either the appliance or display clock (if provided) is not in use, and before cleaning. Allow to cool before putting on or taking off parts, and before cleaning the appliance.
- Do not operate any appliance with a damaged cord or plug or after the appliance malfunctions, or has been damaged in any manner. Return appliance to an Authorized Service Center for examination, repair or adjustment. Do not attempt to replace or splice a damaged cord.
- The use of an accessory not recommended by the appliance manufacturer for use with this appliance may result in fire, electric shock or injury to persons.
- Do not use outdoors.
- Do not let cord hang over edge of table or counter, or touch hot surfaces.
- Do not place on or near a hot gas or electric burner, or in a heated oven.
- Always attach plug to appliance first, then plug cord into the wall outlet (for appliances with detachable cords). To disconnect, turn any control to the off position, then remove plug from wall outlet.
- Do not use appliance for other than intended use. Misuse can cause injuries.
- Intended for household countertop use only. Keep 6 inches (152 mm) clear from the wall and on all sides. Always use appliance on a dry, stable, level surface.
- All lids should be closed during use.
- Scalding may occur if the lid is removed or opened during or immediately after the brewing cycles. Contents may be hot. Allow to cool before opening the lid.
- This appliance may emit steam while brewing or while contents are hot. To avoid steam burns, keep away from steam. Open lid away from hands and face.
For appliances with glass containers:
- The container is designed for use with this appliance. It must never be used on a range top.
- Do not set a hot container on a wet or cold surface.
- Avoid sudden temperature changes, such as rinsing, washing, filling, or immersing a hot container with cold liquids.
- Do not use a cracked or chipped container or a container having a loose or weakened handle.
- Do not clean container with cleansers, steel wool pads, or other abrasive material.
For appliances with metal straws:
- Do not allow children or persons with reduced physical, sensory, or mental capabilities, or prone to falls for any reason, to handle, use or play with metal straws. Keep away from children.
- Do not use metal straws while on wet or slippery surfaces, running or jogging.
- Do not use metal straw if it has been placed in the freezer. Allow to warm to room temperature before using.
For appliances with service panels:
- WARNING: TO REDUCE THE RISK OF FIRE OR ELECTRIC SHOCK, DO NOT REMOVE THIS COVER. NO USER–SERVICEABLE PARTS INSIDE. REPAIR SHOULD BE DONE BY AUTHORIZED SERVICE PERSONNEL ONLY
POWER CORD INSTRUCTIONS
A short power-supply cord (or detachable power-supply cord) may be provided to reduce risks resulting from becoming entangled in or tripping over a longer cord. Longer detachable power-supply cords or extension cords are available and may be used if care is exercised in their use. If a long detachable power-supply cord or extension cord is used:
- The marked electrical rating of the detachable power-supply cord or extension cord should be at least as great as the electrical rating of the appliance;
- If the appliance is of the grounded type, the extension cord should be a grounding type 3-wire cord; and
- The longer cord should be arranged so that it will not drape over the counter top or table top where it can be pulled on by children or tripped over unintentionally.
- Do not pull, twist or otherwise abuse the power cord.
PRODUCT NOTICES
- Place the appliance on a hard, flat, level surface to avoid interruption of airflow underneath the coffeemaker.
- Glass decanters only: Protect the decanter from sharp blows, scratches or rough handling.
- Do not operate the appliance with an empty water tank.
- Keep the area above the appliance clear during use, as hot steam will escape the appliance.
GET TO KNOW YOUR ICED COFFEEMAKER
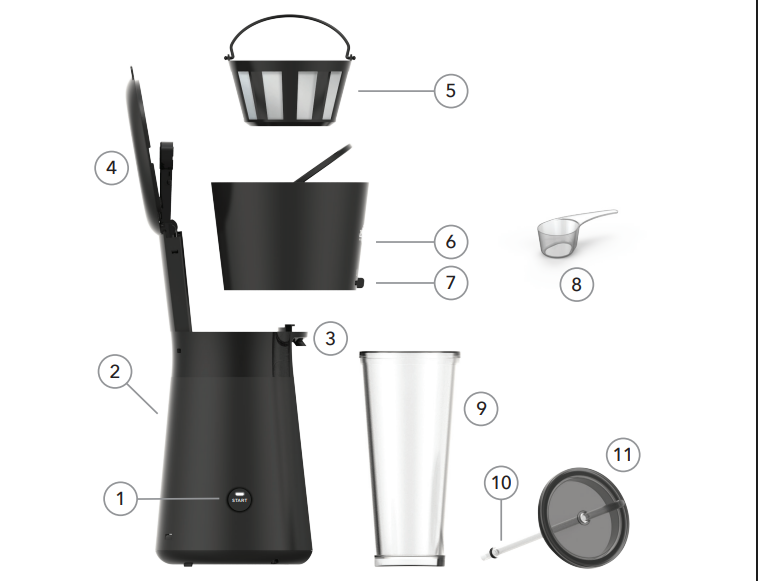
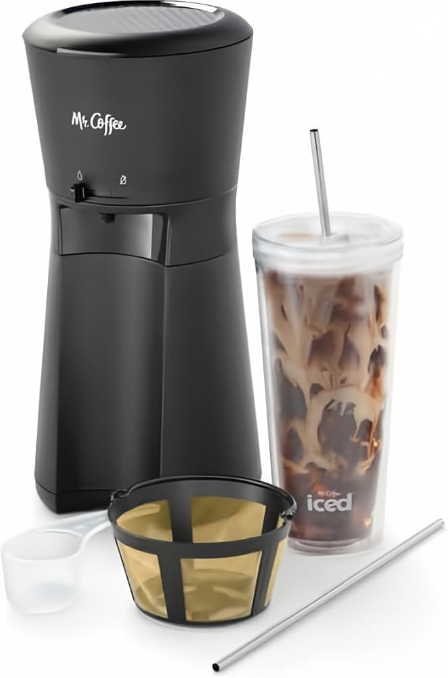
- Start button press to start; unplug to pause brewing. Plugging back in will resume brewing and
unit will turn off automatically once brewing is complete - Base & water reservoir pour water in here (do not place ice in the water reservoir)
- Brew spout
- Lid
- Reusable coffee filter is dishwashable (not available in all units. Ultra durable gold tone filter available in select units)
- Brew basket insert filter filled with grounds here
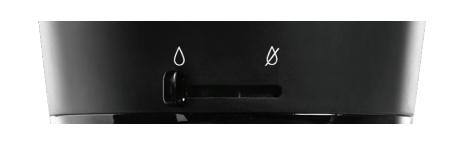
- Drip-stop slides open to allow the flow of coffee and closes to stop dripping on the counter when brewing is finished
- Scoop use to measure coffee grounds
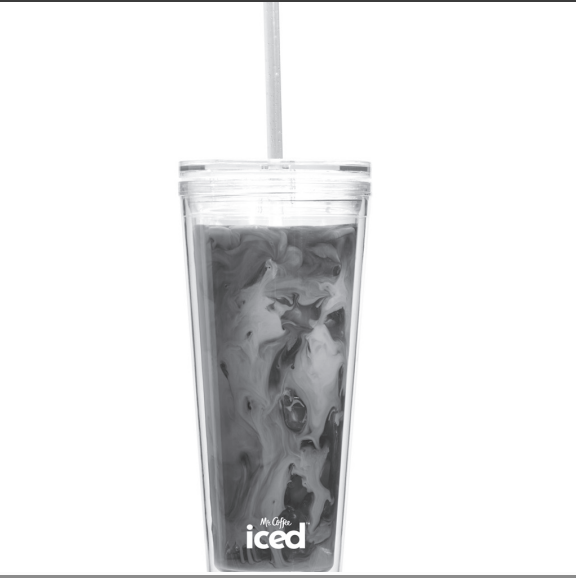
- Tumbler is 22 oz. double-wall insulated and BPA free
- Tumbler straw stainless steel straws available in select units
- Tumbler lid
CLEAN ICED COFFEEMAKER BEFORE FIRST USE
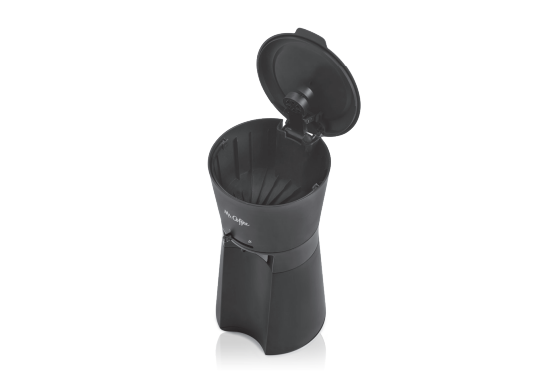
Just follow these simple steps:
CAUTION: To avoid potential damage to the unit, do not plug in machine without water in unit.
- Wash the tumbler, lid, straw, coffee filter and brew basket in a mixture of mild detergent and water. Rinse each thoroughly.
- Start with the unit unplugged. Fill tumbler with water to the water line and pour into reservoir. Replace brew basket in position and nylon filter (or paper 12-cup basket style paper filter) into brew basket. Slide brew spout to open.
- Position tumbler under brew spout, plug in unit and press START.
Note: The unit is on when the LED is lit. - When brewing is complete, discard water from tumbler and rinse tumbler thoroughly with clean water.
- Your Iced Coffeemaker is now ready for use!
LET’S MAKE ICED COFFEE!
- Start with the unit unplugged.
WARNING: To prevent injury from hot steam or potential damage to the unit, do not plug the unit in until the water is in the reservoir and the tumbler is put in place under the drip spout (step 9). - Fill the tumbler to the “WATER” marking with clean, filtered water.
- Lift the lid of the unit and remove the brew basket portion , exposing the water reservoir.
- Pour the water into the reservoir .
Note: Never fill water reservoir above MAX fill line. - Place the brew basket back on top of the reservoir. Place the reusable coffee filter or standard 12-cup basket style paper filter into the brew basket.
- Slide drip-stop switch to open

- Using the coffee scoop , pour 1 level scoop of grounds into the provided reusable coffee filter. Close the lid.
Note: If you want a bolder cup of iced coffee, you can use 1½ – 2 scoops of grounds. - Fill the tumbler with large ice cubes to the “ICE” marking.
- Place tumbler full of ice under drip spout and plug unit in. Press the “START” button and ensure the LED is illuminated.
- Wait 3-4 minutes for brewing to complete. Once dripping slows and stops, slide the drip-stop to closed to stop the flow of coffee.

- Add in your favorite coffee mix-ins for coffee just how you like it.
- Insert straw in lid , place lid on tumbler, and enjoy!
HOW TO CLEAN YOUR ICED COFFEEMAKER
Minerals (like calcium and limestone) found in water can leave deposits in your iced coffeemaker and affect its performance. Decalcifying your iced coffeemaker is an important part of ensuring your coffee always tastes great! We recommend decalcifying your iced coffeemaker once per month to keep it at peak performance. It’s an easy process – see below:
- Prepare 1 cup (8 oz.) of undiluted, white household vinegar. Pour the vinegar into the water reservoir.
- Place the reusable coffee filter (or a standard 12-cup basket filter) into the brew basket and close the lid.
- Place the tumbler under the spout and press the START button to run a brew cycle.
- Once the iced coffeemaker has shut off, discard the contents of the tumbler. Remove the reusable coffee filter or paper filter from the brew basket.
- Rinse out the tumbler, reusable coffee filter and brew basket with clean water.
- Fill tumbler to “WATER” marking with clean water and pour water into the water reservoir.
- Place tumbler under spout and press “START” button to run a brew cycle.
- Discard water and rinse tumbler thoroughly with clean water.
- Repeat steps 6-8 one more time, to ensure the iced coffeemaker is thoroughly rinsed.
Your iced coffeemaker is now clean and ready to brew delicious iced coffee whenever you need a pick-me-up
DISHWASHER SAFE PARTS OF YOUR ICED COFFEEMAKER
To thoroughly clean your iced coffeemaker, you can put the following parts into the top-rack of the dishwasher:
- Reusable coffee filter
- Brew basket
CAUTION: THE ELECTRICAL BASE, POWER CORD AND PLUG ARE NOT DISHWASHER SAFE AND SHOULD NEVER BE IMMERSED IN WATER OR OTHER LIQUIDS
FAQ
How does it work?
The Mr. Coffee Iced™ Coffeemaker uses RapidChill™ brewing to brew hot concentrated coffee directly over ice to ensure the freshest flavor. By using just the right amount of coffee, water and ice, the iced coffee still tastes great even as the ice melts. This is because it uses similar amounts of water as traditional hot coffee just some of it starts out as ice!
My iced coffee is not strong enough for my taste – how do I make stronger iced coffee?
No problem everyone’s tastes are different! Add another half scoop of coffee grounds into the reusable coffee filter next time you make iced coffee. If that’s still not strong enough, try a full extra scoop. Add until you find the perfect ratio for you!
Is the tumbler dishwasher safe?
No, tumbler lid and straw should be hand-washed only.
Why is there no ice left in my cup after I brew my iced coffee?
Try using bigger ice cubes when making your iced coffee – these will melt slower and give you ice in your drink for longer! Also, ensure you have filled the tumbler to the ice marking.
Why doesn’t the iced coffeemaker fill the tumbler with iced coffee to the top?
We know many people like to customize their coffee beverages. For this reason, we designed the machine to leave a little extra room for milks, cream, sugar or syrups! However, for a more full tumbler, you can fill the water reservoir to the “MAX FILL” line.
Can I use a different tumbler / cup for making iced coffee?
Sure! Most cups should fit underneath the spout of the iced coffeemaker – just ensure you keep the same ratio of water-grounds-ice to create the best tasting iced coffee!
Why isn’t the coffee dispensing into my tumbler?
The drip-stop might be set to closed . Slide the drip-stop over to open and your coffee will flow through.
Why are there grounds in my iced coffee?
You may have over-filled your reusable coffee filter with grounds and they could have spilled over the top. Although this is uncommon, try using a little less grounds next time and that will solve your grounds issue!
How do I turn my iced coffeemaker off?
The iced coffeemaker will turn off on its own after the brewing cycle has completed. If you would like to pause the brewing cycle, you can unplug the unit.mPlug the unit back in to resume brewing and allow machine to finish brewing before it turns off.
WARRANTY INFORMATION
1-YEAR LIMITED WARRANTY
Sunbeam Products, Inc. (“Sunbeam”) warrants that for a period of one year from the date of purchase, this product will be free from defects in material and workmanship. Sunbeam, at its option, will repair or replace this product or any component of the product found to be defective during the warranty period. Replacement will be made with a new or remanufactured product or component. If the product is no longer available, replacement may be made with a similar product of equal or greater value. This is your exclusive warranty from Sunbeam.
This warranty is valid for the original retail purchaser from the date of initial retail purchase and is not transferable. Keep the original sales receipt. Proof of purchase is required to obtain warranty performance. Sunbeam dealers, service centers, or retail stores selling Sunbeam products do not have the right to alter, modify or any way change the terms and conditions of this warranty. This warranty does not cover normal wear of parts or damage resulting from any of the following: negligent use or misuse of the product, use on improper voltage or current, use contrary to the operating instructions, disassembly, repair or alteration by anyone other than Sunbeam or an authorized Sunbeam service center. Further, the warranty does not cover: Acts of God, such as fire, flood, hurricanes and tornadoes.
For more manuals by Mr. Coffee, visit ManualsLibraryy
Mr. Coffee Iced Coffee Maker-FAQs
Q1. How do I use the Mr. Coffee Iced and Hot Coffee Maker?
Fill the water reservoir, place a filter with ground coffee in the brew basket, and choose either the Hot or Brew-Over-Ice setting. For iced coffee, fill your tumbler with ice before brewing.
Q2. How does the Brew-Over-Ice function work?
The machine starts with hot water to extract flavor, then switches to cooler water to reduce ice melt. This keeps your drink flavorful without being watered down.
Q3. What is the right coffee-to-water ratio for this machine?
A good starting point is the golden ratio: 1:16 (1 part coffee to 16 parts water). For a single cup, use about 1½–2 tablespoons of ground coffee per 6 ounces of water.
Q4. How much coffee should I use for a full pot?
For an 8-cup brew, use about 8 scoops (16 tablespoons) of medium-ground coffee. Adjust slightly for stronger or milder taste.
Q5. What type of coffee can I use for iced coffee?
You can use regular ground coffee, cold brew blends, or even espresso grounds for stronger flavor. Just brew directly over ice.
Q6. What’s the best way to make iced coffee at home with this machine?
Fill your tumbler ¾ full with ice.
Add your preferred sweeteners or milk to the tumbler.
Brew coffee using the Brew-Over-Ice setting directly over the ice.
Stir and enjoy.
Q7. How do I keep iced coffee from tasting watery?
Use the iced setting, brew a stronger ratio (slightly more coffee grounds), and always fill your tumbler with enough ice before brewing.
Q8. Can I use espresso for iced coffee?
Yes. Brewing espresso directly over ice makes a stronger, café-style iced coffee that holds flavor well when diluted.
Q9. What’s the ideal water temperature for brewing?
The recommended range is 195°F to 205°F (90°C to 96°C), which the machine automatically regulates.

