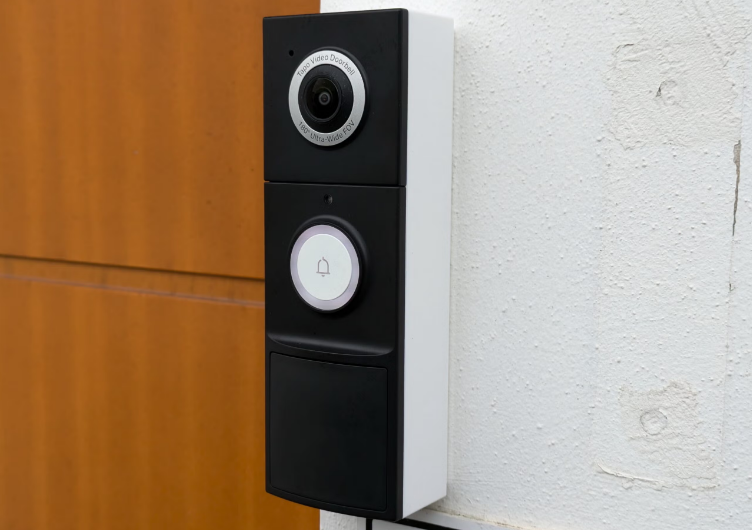
TP-Link Tapo D235 2K Wi-Fi Video Doorbell
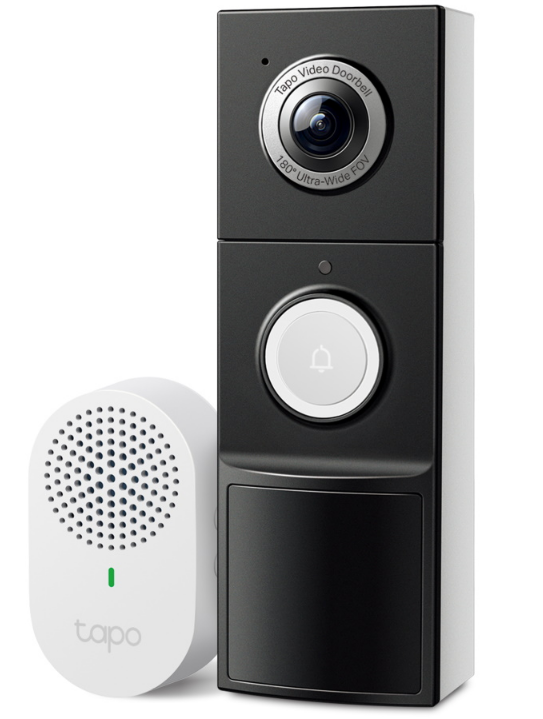
Set Up Your Doorbell and Chime
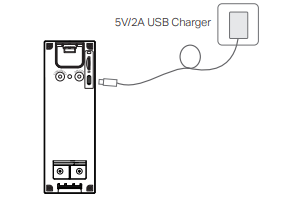
- Plug in the USB cable to charge your doorbell. When you plug in the charger, the LED should blink amber quickly for 3 seconds.

- Download the Tapo app from the App Store or Google Play.

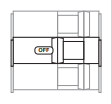
- Press and hold the ON/OFF button on the back of the doorbell for 3 seconds to turn it on.

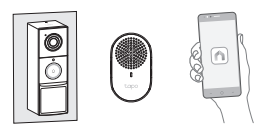
- Tap the button in the app and select your model. Follow the app instructions to set up your doorbell and pair it with the chime. Note: If you didn’t pair the chime during the setup.

Determine Power Options
Option 1: Battery Powered
If you don’t have existing doorbell wiring at the door, use the built-in battery. You are free to determine the doorbell position, and the mounting is easy and quick. When the doorbell battery level is low, you need to detach and charge it. For installation, skip 01/ Install Jumper Wire for Your Existing Chime and choose either installation option to install your doorbell without existing wires.
Option 2: Hardwire Powered
WARNING: Risk of Electric Shocks
- Your existing doorbell must be wired (not battery powered) and supplied by an 8-24V AC, 10VA Minimum transformer.
- Ensure that your existing doorbell works by ringing the doorbell.
- Locate your existing doorbell chime.
- Disconnect power at the fuse or circuit breaker before installing.
- You can always find detailed wiring and installation instructions in the Tapo app.

- Enabling Always-On Mode requires bypassing your existing chime.
- For installation, follow the instructions in the Mount Your Doorbell section to bypass your existing chime and install your doorbell with existing wires.
- Disabling Always-On Mode allows you to use your existing chime.
- For installation, skip 01/ Install Jumper Wire for Your Existing Chime and then install your doorbell with existing wires.
Mount Your Doorbell
Install Jumper Wire for Your Existing Chime
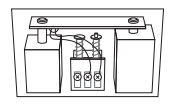
- Turn off the circuit breaker. Make sure the power is off by ringing your doorbell a few times.

- Remove the chime cover and take a photo of the wiring in case you want to reconnect it.

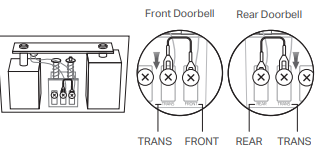
- Slightly loosen the screws for the Front and Trans of your front doorbell or the Rear and Trans of your rear doorbell, then insert the included jumper wire

- Tighten the screws and replace the chime cover. If you want to disable Always-On Mode, just remove the jumper wire.
Preparations for Installing Your Doorbell
- Remove your existing doorbell from the door. Then disconnect the wires.

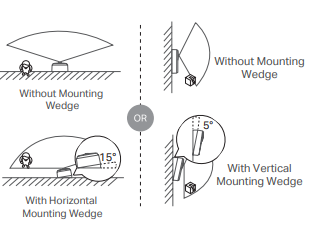
- (Optional) Select the mounting wedge to adjust the viewing angle of the doorbell.

Install Your Doorbell
Option 1. Stick to a clean wall
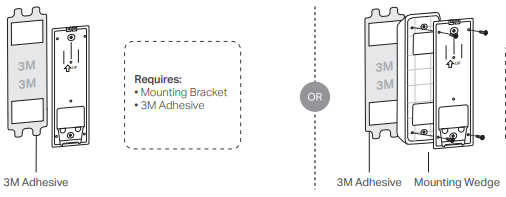
- Attach the included adhesive to the back of the bracket or the wedge you have selected. If you use the wedge, affix the bracket and the wedge with screws.

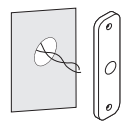
- Route the wires through the bracket (if there are existing wires). Wipe off the dust from the surface using a dry cloth, stick the bracket with adhesive to the smooth wall, and press it down for 15 seconds to ensure the bracket is firmly attached.
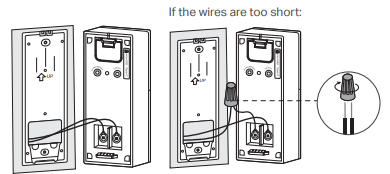
Note: This applies to tile, glass, marble, metal, stainless steel, and smooth wall surfaces. - Mount the doorbell to the bracket: Option A: With Existing Wires. Connect the wires to the two terminals at the back of the doorbell, and tighten the screws. Mount the doorbell to the bracket and turn on the circuit breaker

Option B: Without Existing Wires Mount the doorbell to the bracket and turn on the
circuit breaker.
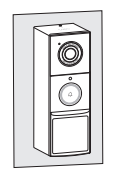
Option 2. Mount to the wall
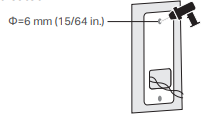
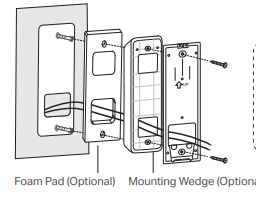
- Route the wires (if there are existing wires) through the mounting template and stick the template. Drill two holes where indicated.

- Route the wires (if there are existing wires) through the bracket. Insert two anchors into the holes and use the screws to affix the bracket over the anchors.

- Mount the doorbell to the bracket.
Option A: With Existing Wires Connect the wires to the two terminals at the back of
the doorbell, and tighten the screws. Mount the doorbell to the bracket and turn on the circuit breaker.
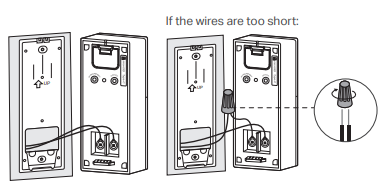
Option B: Without Existing Wires. Mount the doorbell to the bracket and turn on the
circuit breaker
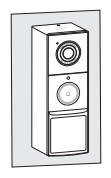
Doorbell Appearance
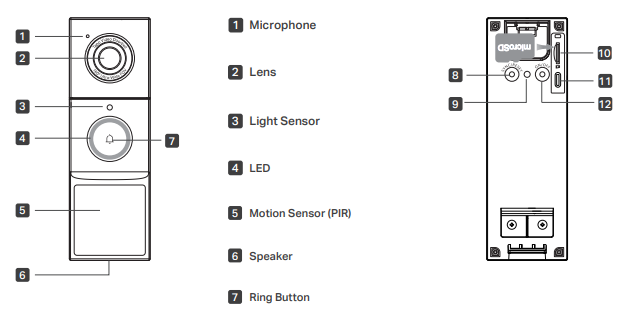
- SYNC/RESET Button: Press and hold for 5s: Reset to factory settings
- Anti-Theft Button: When the Anti-Theft Alarm is enabled on the Tapo app, an
- Press and hold for 5s: Pause the alarm (Continues to alarm when released)
- Press and hold simultaneously for 10s: Disable the anti-theft alarm feature
- 0 microSD Card Slot: Tear off the silicone cover and insert a microSD card.
Initialize it on the Tapo app before use. *microSD card not included - Type-C Port: Plug in the USB cable to charge your doorbell.
- ON/OFF Button: Press and hold for 3 seconds to turn on/off the doorbell.
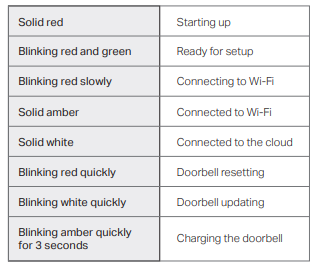
Doorbell LED Indication
Chime Appearance
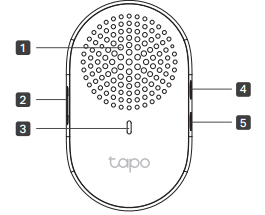
- Speaker
- Reset Button
- Use a pin to press and hold for 5s: Reset Wi-Fi settings
- Use a pin to press and hold for 10s: Reset to factory settings
- LED: Press to cycle through different ringtones.
- Volume Button
- Music Button: Press to adjust the volume of the ring.
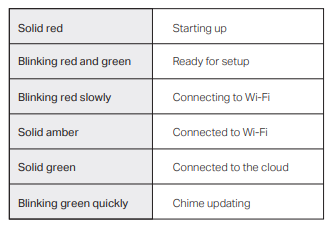
Chime LED Indication
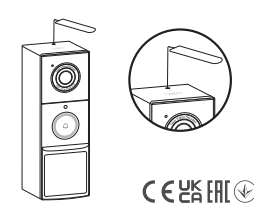
How to Detach a Doorbell
Use the doorbell detaching pin provided if you wish to detach the doorbell from the mounting bracket.
FOR MORE MANUALS BY TP-LINK, VISIT MANUALSLIBRARYY
TP-Link Tapo D235 2K Wi-Fi Video Doorbell-FAQs
Q1. How do I set up the Tapo D235 doorbell?
Download the Tapo app, create or log in to your TP-Link account, and follow the in-app instructions to connect the doorbell to your Wi-Fi.
Q2. Can I use my existing chime with the Tapo D235?
Yes, but only if your chime is wired and powered by an 8–24V AC, 10VA minimum transformer. If you enable Always-On Mode (24/7 recording), the existing chime must be bypassed.
Q3. Can the Tapo D235 work without Wi-Fi?
A Wi-Fi connection is required for setup and smart features like live view, instant alerts, and cloud storage. Without Wi-Fi, only basic wired doorbell functions work.
Q4. Does the Tapo D235 run on AC or DC power?
The Tapo D235 supports both AC and DC input for flexible installation.
Q5. Does the Tapo D235 have night vision?
Yes. It features full-color night vision with a spotlight and a 180° wide field of view for clear head-to-toe coverage.
Q6. Can the Tapo D235 record continuously?
Yes, when hardwired and paired with a microSD card, it can record 24/7. Otherwise, it records motion-triggered events to save storage.
Q7. Which app is needed for the Tapo D235?
Use the Tapo app (available on iOS and Android) to set up, manage, and view your doorbell camera from anywhere.
Q8. Is the Tapo D235 weatherproof?
Yes. The Tapo D235 is IP66-rated, making it resistant to dust and rain for reliable outdoor use.

