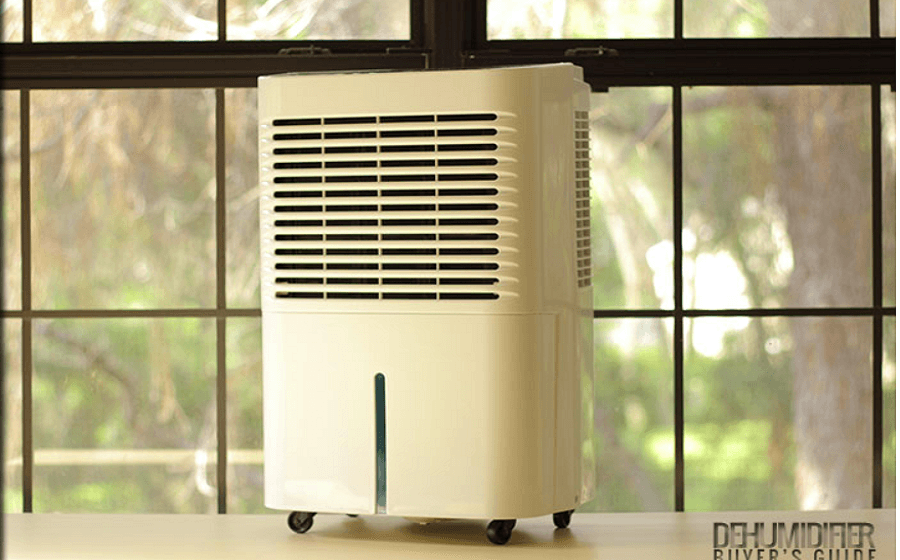
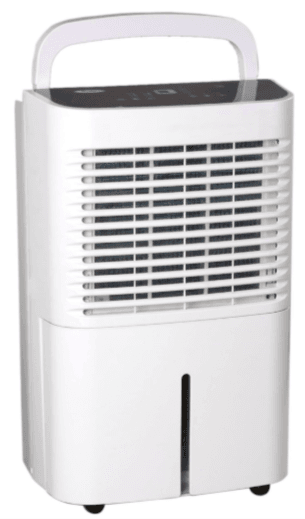
Whirlpool Dehumidifier
INSTALLATION REQUIREMENTS
Electrical Requirements
Recommended Grounding Method
- This dehumidifier must be grounded. This dehumidifier is equipped with a power supply cord with a three-prong grounding plug. The cord must be plugged into a mating, grounded three-prong outlet, grounded in accordance with all local codes and ordinances. If a mating outlet is not available, it is the customer’s
responsibility to have a properly grounded three-prong outlet installed by a qualified electrical installer - It is the customer’s responsibility:
- To contact a qualified electrical installer
- To assure that the electrical installation is adequate and conforms to the Nation Electrical Code, ANSI/NFPA 70-last edition, and all local codes and ordinances
Location Requirements
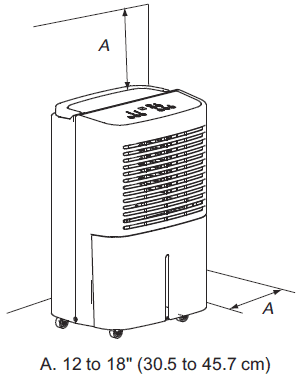
NOTE: Your model may differ from the one shown.
- Allow at least 12 to 18″ (30.5 to 45.7 cm) of space on the side of the dehumidifier for models with side louvres and above the dehumidifier for models with top louvres.

- You will need a surface strong enough to support the dehumidifier when its bucket is full of water.
- You will need a surface level enough to keep the water from spilling when the bucket is full of water.
- Keep all outside doors, windows and other openings closed when you are operating the dehumidifier. Humid outdoor air will increase the dehumidifier’s workload.
- Install the dehumidifier in an area where the temperature will not fall below 38 ºF (3 ºC). Lower temperatures will cause performance
- Do not block the louvers on the front panel and the side panel.
DEHUMIDIFIER USE
Setting the Controls
Control Panel
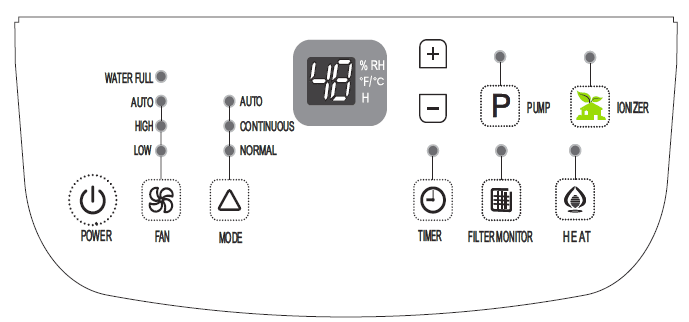
NOTES:
- The control panel of your model may differ from the one shown above.
- PUMP, HEAT, IONIZER button may not be displayed on the panel, if your model does not have these functions.
Starting/Stopping the Dehumidifier
NOTES:
- Before turning on the dehumidifier, be sure that the bucket is empty and fits all the way into the dehumidifier.
- Each time you unplug the dehumidifier or power is interrupted, the controls will return to the previous settings when power is restored.
- Minimum operating temperature is 38 ºF (3 ºC)
- Humidity displayed is between 30% Relative Humidity and 90% Relative Humidity
- Humidity can be adjusted between 30% Relative Humidity and 80% Relative Humidity.
- Plug into a grounded three-prong outlet.
- Press POWER to turn on the dehumidifier.
- Press FAN to choose the fan speed.
- Press MODE to choose the mode.
- Press the plus or minus arrow button to choose the level of humidity.
- Press POWER
 to turn off the dehumidifier.
- NOTE: The dehumidifier will retain your last settings.
WATER FULL Light
If this light is on, the dehumidifier is not running. This light indicates that you need to check:
- If the bucket is full, empty and reinstall the bucket.
- If the bucket is not in position, remove the bucket and reinstall it. Make sure the bucket fits all the way into the dehumidifier and the light is off, or dehumidifier and the the heat modes will not run.
Fan Speed
- Press FAN to select fan speed.
- Choose Low, High or Auto

- Low_Will reach the desired humidity setting slower with lower sound level.
- High—Will reach the desired humidity setting faster.
- Auto—Will provide the maximum humidity control by automatically adjusting the fan speed
Desired Humidity
- Press MODE to select the desired humidity setting
- Choose Auto Dry, Continuous or Normal.
- Auto Dry: Will operate the dehumidifier only in the dry mode. Auto Fan Speed is set automatically. The Desired Humidity is set to 50% automatically
- Continuous: Will operate the dehumidifier continuously The Fan Speed can be adjusted. The Desired Humidity can not be adjusted. The LED display will show the room humidity level.
- NOTE:
- The de-icer will turn off the compressor if a low-temperature condition exists. Pressing the Desired Humidity button or the plus or minus arrow button will not increase or decrease the amount of moisture removed. When the de-icer senses the correct operating temperature, the compressor will cycle back
on.
Humidity Level
- Press the Plus or Minus button to activate the humidity setting program. Digits in the digital display will flash.
- Press the Plus or Minus button again to set your desired humidity.
- The digital display will stop flashing five seconds after setting. Room humidity will be displayed.
- Note:
- Humidity can only be adjusted manually in Normal mode. In Continuous and Auto Dry mode, the humidity level is set automatically.
Digital Display
The display shows relative humidity or time (depending on the setting).
- When the dehumidifier operates in Desired Humidity modes, the display shows the relative humidity of the room.
- When the timer is selected, the display shows the time when the dehumidifier will turn on or turn off, depending on the setting
- For heat function model, when the dehumidifier operates in heat mode, the display shows the room t.e temperature.

Timer
To set the Timer for a 30-minute to 24-hour delay before the dehumidifier is turned off (the dehumidifier must be On):
- Press TIMER. Timer indicator light will come on, the Display will flash. the display will show remaining hours before the dehumidifier will turn off.
- Press the Plus or Minus arrow button to change the delay time, from 30 minutes to 24 hours
To set Timer to turn on the dehumidifier, keeping previous setting:
- Turn off the dehumidifier.
- Press TIMER. Timer indicator light will flash. The display will show remaining hours before the dehumiditier will turn on.
- Press the Plus or Minus arrow button to change the delay time, from 30 minutes to 24 hours.
- After five seconds, the Timer indicator light will remain on. The display will show the current relative humidity of the room or show the current temperature of the room if it operating in heat mode for some model.
Filter Monitor
- When Filter Monitor indicator light is lit, remove, clean and replace air filter. See “Cleaning the Air Filter”.
- Press FILTER MONITOR
 after cleaning and replacing the air filter. This resets the filter monitor
- NOTE: When the light is on. it will remain on for 180 hours or until you press FILTER MONITOR. After 180 hours, it will turn off automatically.
Heat (for heating function model only)
NOTE: The compressor does not operate in the HEAT mode.
- Press HEAT
 to select the Heat mode.
 - Press FAN to select the fan speed. see “Fan Speed”.
- Press the Plus or Minus arrow button to select the temperature.
- To turn off the Heat mode, press MODE or POWER
- NOTE: If the room temperature is above 86 ºF (30 ºC) , the Heat mode will turn off. The fan keeps running
- If the room temperature is 2 ºF (1 ºC) . higher than the selected temperature, the Heat mode will turn off.
- If the room temperature is 2 ºF (1 ºC) lower than the selected temperature, the Heat will turn on.
Change from ºF to ºC
- Press both the plus and minus arrow button at same time to change from ºF to ºC.
Pump (for Pump function model only)
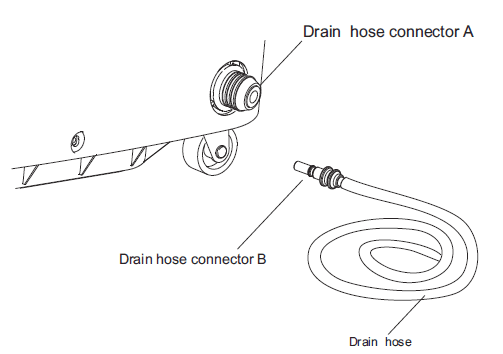
- This feature can help to pump water horizontally or vertically with a 16 feet hose included. You can also pump water to a drain, out a window or anywhere you think suitable.
IMPORTANT:
You must connect the drain hose to the unit before pressing Pump button![]() . see “Pump drain” for connecting direction
. see “Pump drain” for connecting direction
- Press PUMP to activate the pump system for active drainage.
- Once the pump button is pressed, the pump light will switch on.
- NOTE:
- If the pump light flashes, it means that the pump is not functioning properly.
- If the drain hose is not correctly connected to the unit or is bent, the pump light will flash and the pump system will not work. See “Trouble shooting” for direction.
Ionizer (for Ionizer function model only)
- Press IONIZER
 to start or stop the ionizer.
 - Once the IONIZER button is pressed the ionzier light will switch on
Draining the Dehumidifier
Option 1 Remove Bucket
If you floor drain is not available, or you do not plan to run your dehumidifier continuously, you may want to simply empty the bucket.
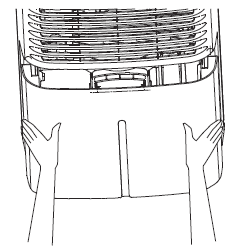
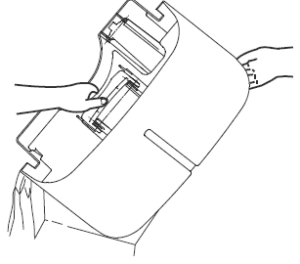
- Grasp the bucket sides to slide out bucket.

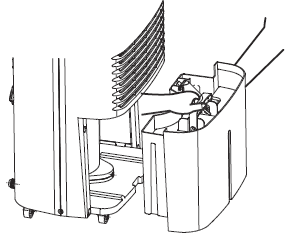
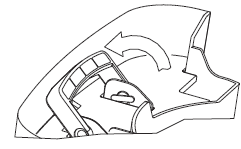
- Grasp the handle and bottom of the bucket to lift bucket.

- Pour water through opening into a sink or tub.

- Replace the handle ,and reinstall bucket.

- IMPORTANT:
- If the Water full light comes on, the dehumidifier will not operate. Empty or adjust bucket
Option 2 Connect Drain Hose
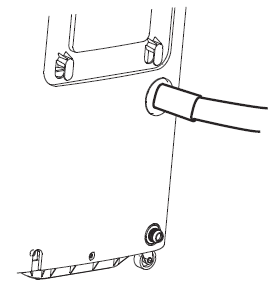
If you plan to run your dehumidifier continuously, you may want to choose direct draining by attaching a garden hose to the unit.
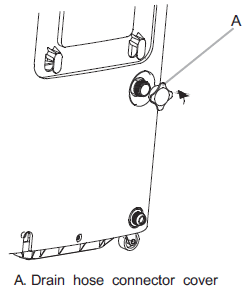
- Remove screws from connector cover

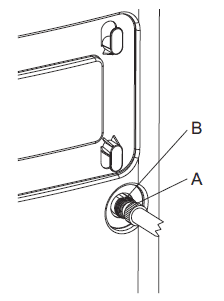
- Attach a garden hose to drain hose connector of the dehumidifier. Hand tighten.
- NOTES: The hose is sold separately.

- A. Garden hose
- B. Drain hose connector dehumidifier. Hand tighten.
- NOTES: The hose is sold separately.
- Place the other end of garden hose into a floor drain. Check to see that the hose lies flat and is in the drain

- NOTES:
- To use the bucket without the garden hose, remove the garden hose. Then reinstall bucket.
- The bucket must be installed and properly aligned for the dehumidifier to operate with or without a garden hose connected
Option 3 -PUMP-Drain (for Pump function model only)
- This feature can help to pump water horizontally or vertically with a 16 feet house included. You can also pump water to a floor drain, out a window or anywhere you think suitable.
- NOTE: You must connect the drain hose (with connector B) to drain hose connector A before pressing Pump button. If the pump does does not function properly, see “Troubleshooting” for direction.

Normal Sounds
When your dehumidifier is operating normally, you may hear sounds such as:
- Compressor sounds, which may be loud, This is normal.
- Air movement from the fan
- Clicking sounds when the dehumidifier or compressor turns off and on, and when the Automatic Shut off Switch is working
DEHUMIDIFIER CARE
Cleaning the Air Filter
The air filter is removable for easy cleaning. A clean filter helps remove dust, lint, and other particles from the air and is important for best operating efficiency. Check the filter every two weeks to to see whether it needs cleaning.
- Turn off the dehumidifier.
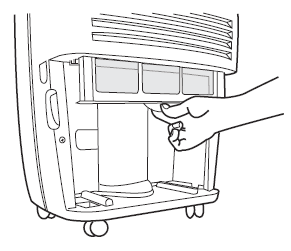
- Remove the bucket.
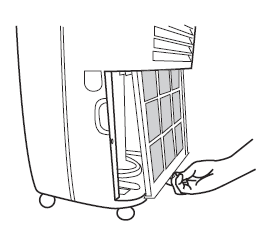
- Pull the air filter down from below the front louvres.

- Pull the bottom edge of the air filter away from the dehumidifier to clear the bottom of the dehumidifier

- Use a vacuum cleaner to clean air filter. If the air filter is dirty, wash it in warm water with a mild detergent. Do not wash air filter in the dishwasher or use any chemical cleaners. Air dry filter completely before replacing to ensure maximum efficiency
- Slide the air filter up into the dehumidifier.
- Reinstall the bucket.
- Turn on the dehumidifier
Cleaning the Dehumidifier
Exterior
NOTE:
Have an authorized service technician clean and service the interior coils of your product annually.
- Turn off the dehumidifier.
- Dust the front grille and side panels with a soft brush or the dusting attachment of your vacuum cleaner.
- Water Bucket
- Every few weeks, rinse the inside of the water bucket with a mild detergent to avoid growth of mold, mildew and bacteria.
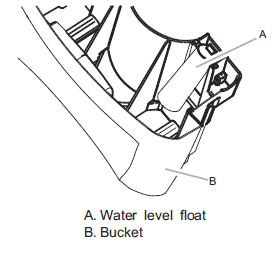
- Water Level Float
- The dehumidifier has a Water full light and a water level float. The bucket must be properly aligned for the water level float and the Water full light to work.
- NOTE: Be sure the float is snapped in place.

TROUBLESHOOTING
Dehumidifier will not run
Is the dehumidifier turned on?
- Turn on the dehumidifier.
Is the power cord plugged into a grounded three-prong outlet?
- Plug into a grounded three-prong outlet. See Electrical Requirements.
Has a household fuse blown or has a circuit breaker tripped?
- Replace the fuse or reset the circuit breaker. If the problem continues, call an electrician. See “Electrical Requirements.”
Is the bucket installed properly?
- Reinstall the bucket so that it fits all the way into the dehumidifier.
For more manuals by Whirlpool, visit ManualsLibraryy
Whirlpool Dehumidifier-FAQs
Why does my Whirlpool dehumidifier keep shutting off?
The sensor may not be accurately reading the humidity level, causing the unit to turn off prematurely. Additionally, a faulty thermistor that works with the sensor could also be the issue.
What is the ideal setting for a dehumidifier?
The best setting is between 30% to 50% relative humidity. A 30% setting is great for very damp areas to prevent mold and allergens, while 50% is ideal for maintaining comfort and controlling dust mites.
What does “Continuous Run” mean on a Whirlpool dehumidifier?
Continuous mode lets the unit run nonstop, depending on the humidity level you select. For automatic drainage, attach a standard garden hose to the drain fitting and direct the water to a floor drain.
What is the recommended humidity level for a home?
A relative humidity level of around 50% is comfortable for most homes. It prevents mold growth, protects belongings, and controls allergens without unnecessary energy consumption.
Should I turn my dehumidifier on and off manually?
Turn off the dehumidifier when the relative humidity drops below 30%-50%. This helps prevent wear and tear, prolonging the lifespan of the unit.
Why does my dehumidifier release warm air?
Warm air from the unit is normal. It occurs as part of the dehumidification process, where the compressor generates heat while removing moisture from the air.
At what temperature does a dehumidifier work effectively?
Dehumidifiers work best at standard room temperatures. Performance may decline in cooler conditions (below 65°F/18°C) due to potential ice formation on the cooling coils.
What does “RH” stand for on a dehumidifier?
RH stands for Relative Humidity, which measures the amount of water vapor in the air as a percentage of its maximum saturation level. 100% RH indicates fully saturated air.

