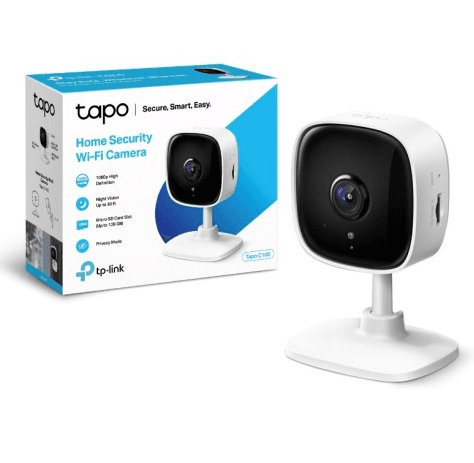
TP-Link Tapo C100 Home Security Wi-Fi Camera
Appearance
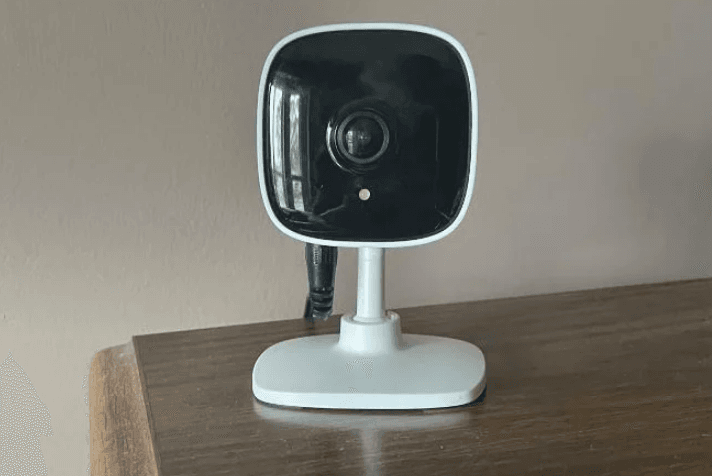
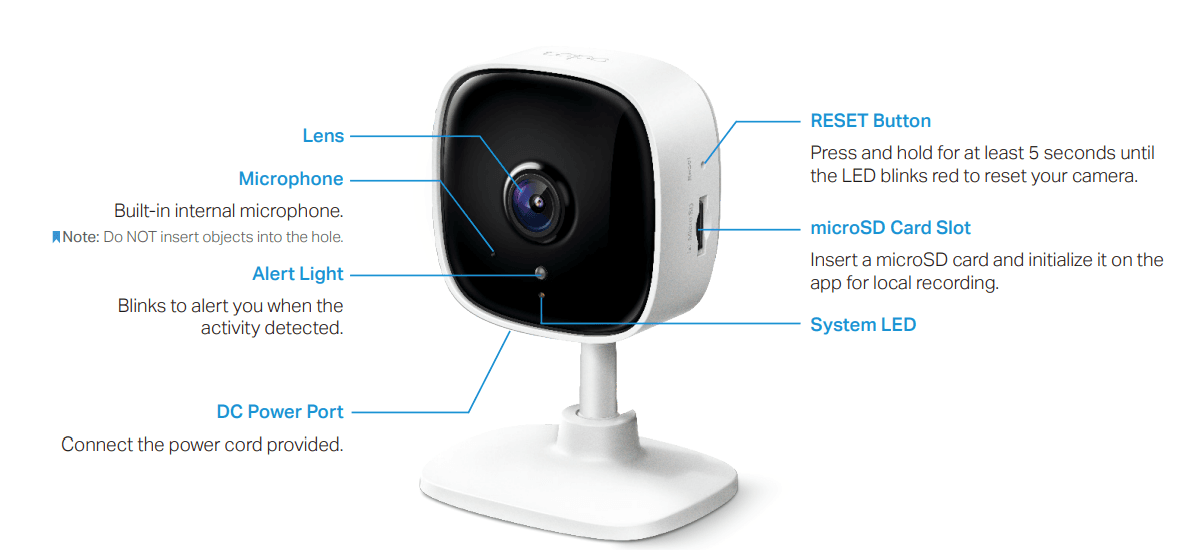
The Home Security Wi-Fi Camera has a system LED that changes color according to its status, an alert light, lens, microphone, DC power port, RESET button and a microSD card slot. Refer below for details.
Set Up Your Camera
Step 1. Download App
Get the Tapo app from the App Store or Google Play, or by scanning the QR code.

Step 2. Log In
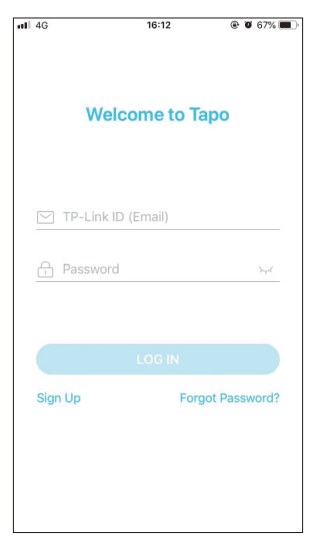
Open the app and log in with your TP-Link ID. If you don’t have an account, create one first.
Step 3. Add Your Camera
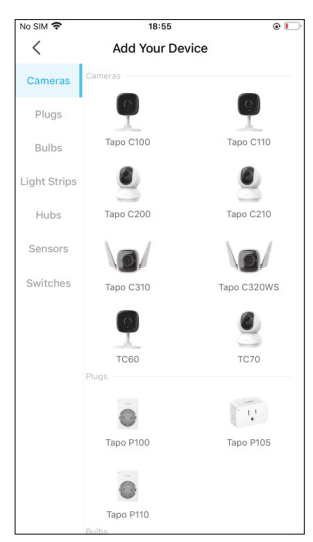
Tap the button in the app and select your model.
Step 4. Configure Camera
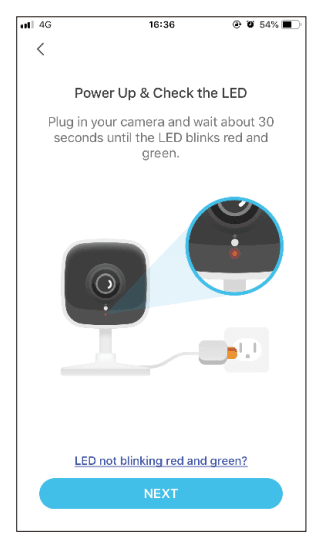
Follow the app instructions to configure your camera and add it to your home network.
Step 5. Place Camera
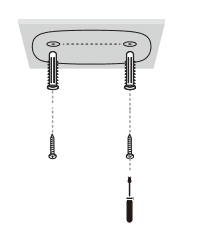
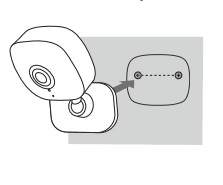
Place your camera on a flat surface, or install it on a wall or ceiling with the provided mounted screws.
- Mark Position: Place the mounting template where you want the camera. For wall mounting, drill two holes through two circles.

- Mount Base: Affix two mounting screws with the help of mounting template. For wall mounting, insert two anchors into holes and screw the screws into the anchors.

- Secure Camera: Hang your camera on the screws.

Main Camera Controls
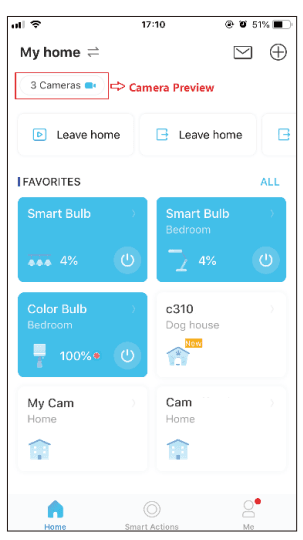
After you successfully set up the camera, you will see your camera listed on the home page. You can view and manage your camera from anywhere at any time with the Tapo app.
Home Page
This page lists all your cameras you’ve added and you can view them directly and manage them easily. Tap the camera or go to Camera Preview > Manage to enter the Live View page.
Live View
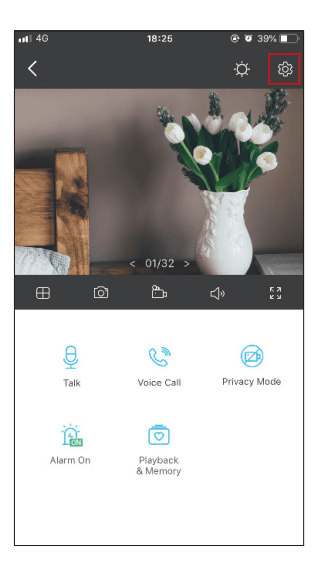
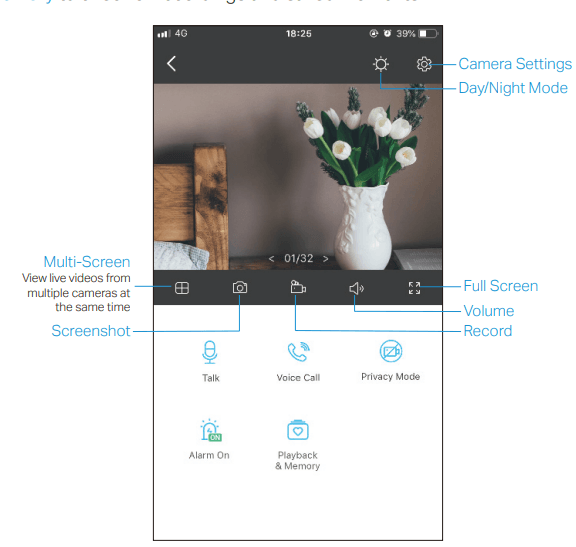
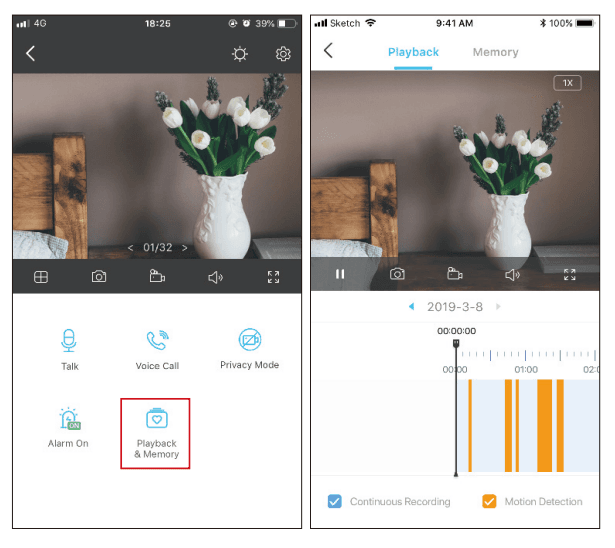
Tap Talk or Voice Call to communicate with loved ones, turn on Alarm to get notified when motions are detected, enable the Privacy Mode to temporarily shut down the surveillance for privacy, or go to Playback & Memory to check all recordings and saved moments.
Camera Settings
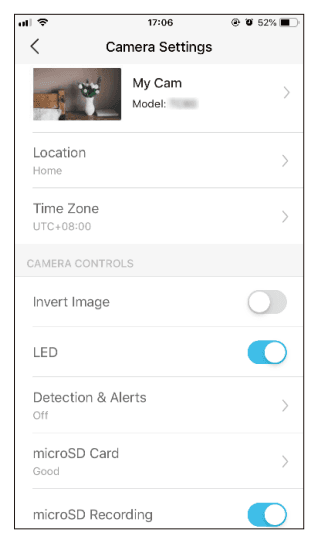
On Live View page, tap ![]() to enter the Camera Settings page. You can change the settings of your camera to meet various needs, such as change your camera name, customize detection settings and recording schedules, turn on or off notifications, set activity zones, etc.
to enter the Camera Settings page. You can change the settings of your camera to meet various needs, such as change your camera name, customize detection settings and recording schedules, turn on or off notifications, set activity zones, etc.
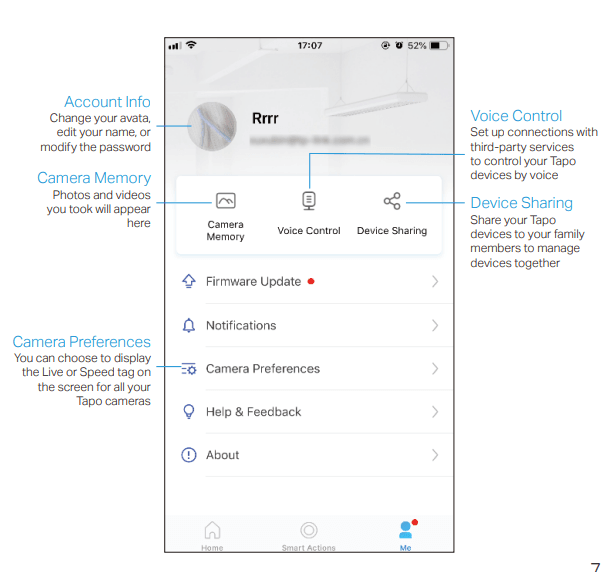
Me
On this page, you can edit your account, quickly check the memorable moments you saved, or find the FAQs of using smart camera and basic info related to the Tapo app.
Motion Detection
With motion detection, the Tapo app alerts you of activity that matters and sends notifications straight to you when motion detected. Insert a microSD card to record the clips when motion detected. Otherwise, you can only receive the notifications.
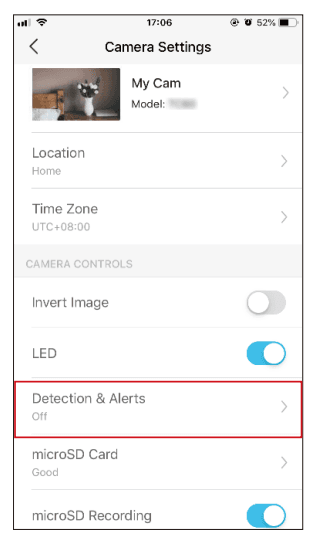
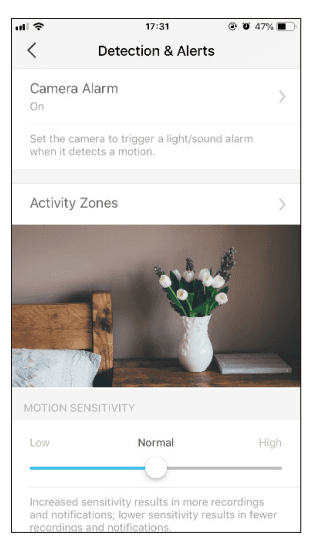
- Go to the Camera Settings page and tap Detection & Alerts to customize its current detection settings.
- On the Detection & Alerts page, enable the Motion Detection function. It’s recommended to enable the Notifications function to receive motion detection messages.
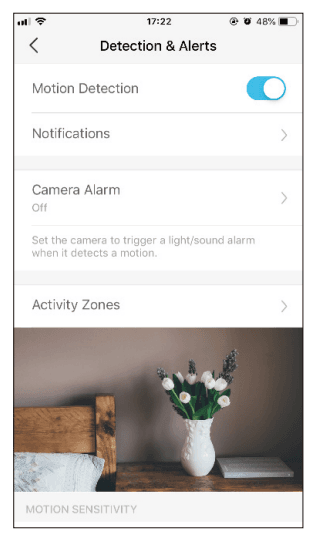
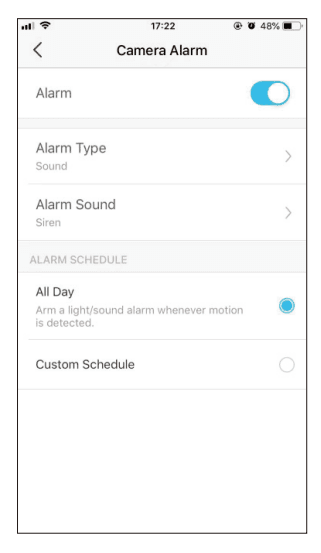
- Customize Camera Alarm settings. Choose Alarm Type (Sound/Light) and Alarm Sound (Siren/Tone), and set Alarm Schedule as needed.
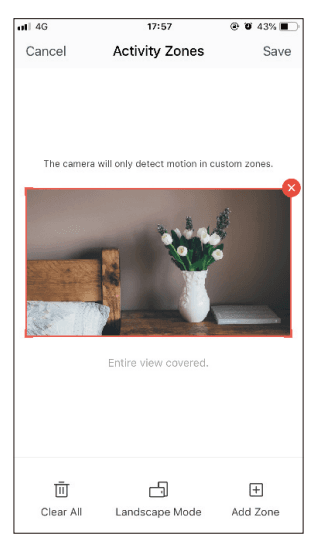
- Customize Activity Zones, and the camera will only detect motion in custom zones. The entire view is covered by default.
- Adjust Motion Sensitivity (Low/Normal/High) as needed. Increased sensitivity results in more recordings and notifications.
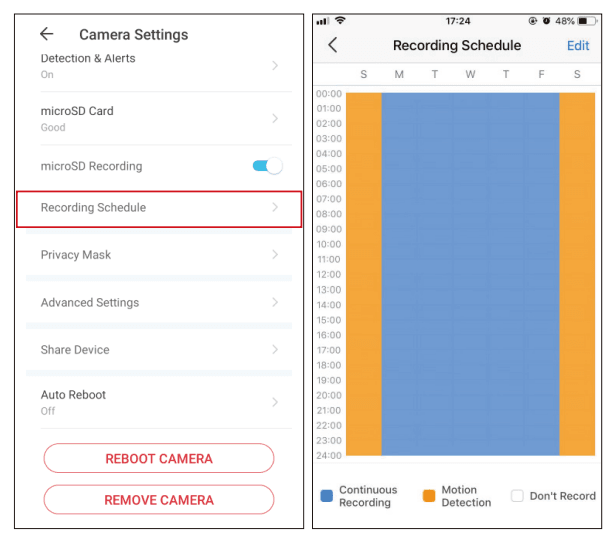
- After editing the detection settings for the camera, you can set the Recording Schedule for the motion detection.
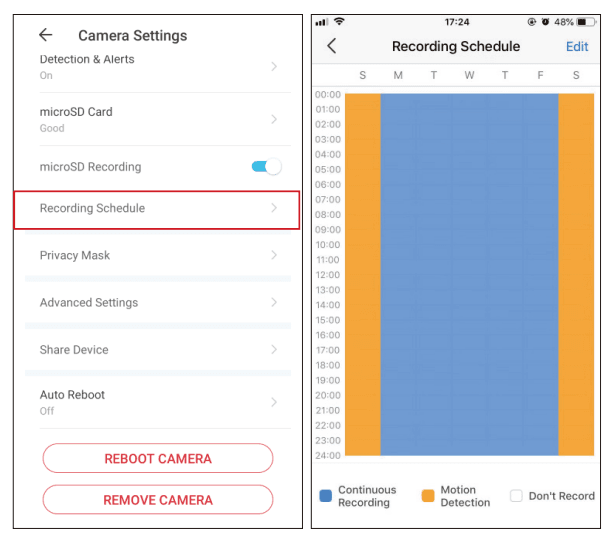
- On the Live View page, tap to find all recordings. The orange sections are recordings for motion detection.
24-hour Recordings
The microSD card is needed for 24-hour recording and it’s suggested to initialize the SD card on the app before using it.
- On the Live View page, tap
 to enter the Camera Settings page.
- Toggle on to enable the microSD Recording function and set the Recording Schedule for Continuous Recording (24-hour Recording) as needed

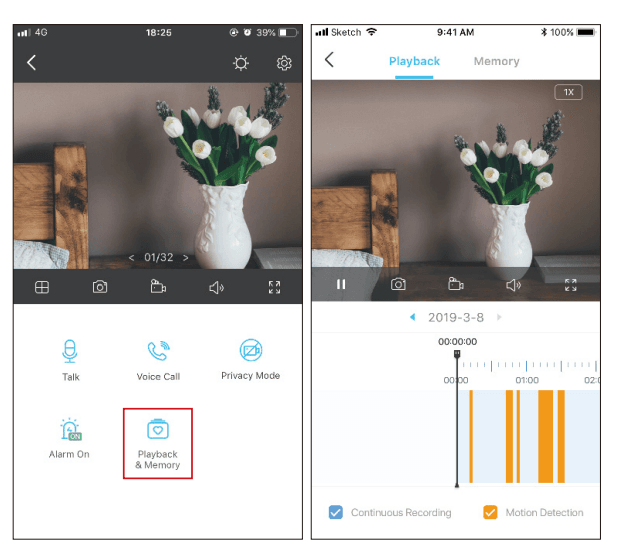
- On the Live View page, tap to find all recordings. The blue sections mean continuous recording.
Privacy Mode
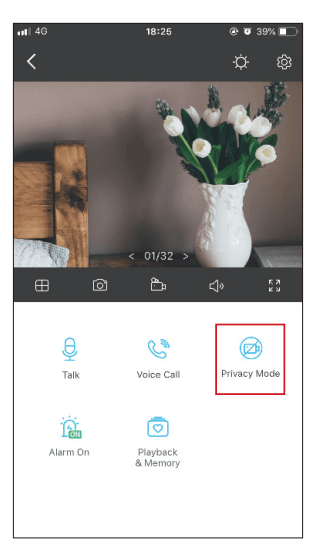
On the Live View page, tap to enable the Privacy Mode. When enabled, streaming and recording functions will be temporarily disabled to protect your privacy.
FOR MORE MANUALS BY TP-LINK, VISIT MANUALSLIBRARYY
TP-Link Tapo C100 Home Security Wi-Fi Camera- FAQs
How many devices can view the Tapo camera at once?
The Tapo C100 supports up to 2 devices viewing the live feed simultaneously via the Tapo app or RTSP streaming.
How does the TP-Link Tapo camera work?
The camera features motion detection with instant alerts and two-way audio, allowing you to speak through the built-in microphone and speaker to communicate with family or deter intruders.
How can I set my Tapo camera to record continuously?
Go to the Live View page, enter Camera Settings, enable Local Recording, and set the schedule to Continuous (24/7) Recording.
Can the Tapo camera work without an internet connection?
Yes, you can use Direct Mobile Device Connection to access the camera without Wi-Fi or internet.
Does the Tapo camera work without electricity?
Battery-powered Tapo models can work without being plugged in, as they are wire-free and don’t require a constant power supply.
Can I share my Tapo camera with others?
Yes, you can share access with up to 5 TP-Link accounts for cameras, doorbells, and robot vacuums, and up to 8 for other smart devices.
How much data does the Tapo camera use?
Streaming in 1080p uses about 300MB per hour. Note: the camera only transmits video during live view, helping reduce data usage.
What size SD card does the Tapo camera support?
The Tapo C100 supports MicroSD or MicroSDXC cards from 64GB up to 1TB in capacity.

