Dartwood FHD 1080P Dashboard Cam
Package Includes
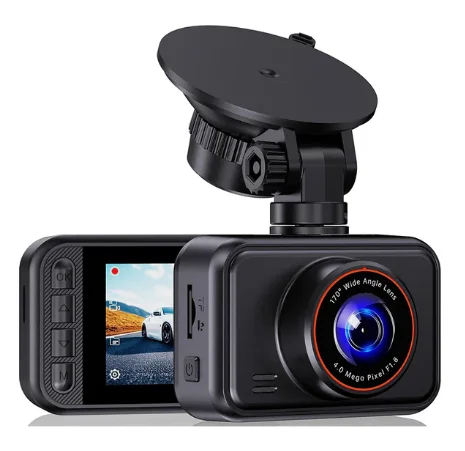
- 1 x Dashboard Camera
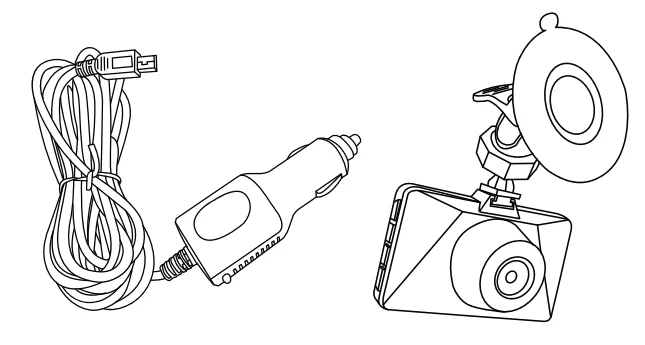
- 1 x Car Charger
- 1 x Suction Mount
- 1 x User Manual
Safety Information
- Never depend on the Dashboard Camera entirely when driving. The image on the screen is different from actual conditions.
- Using the Dashboard Camera is not enough to completely overcome a vehicle’s blind spot. Many preventable injuries and deaths occur in driveways or parking lots when drivers do not see children, pets, or other living things near their vehicles.
- Do not expose the Dashboard Camera & car charger to rain, moisture, or snow.
- Do not operate the car charger with a damaged cord.
- To reduce the risk of electric shock, unplug the car charger before any maintenance or cleaning.
- Never allow children to play with the camera or its parts. Small parts may cause choking.
- The Dashboard Camera is not intended to detect large stationary objects to help avoid damaging the vehicle.
- Objects viewed in the Dashboard Camera differ from their actual distance due to the use of a wide-angle lens. Always check behind and all around the vehicle visually with mirrors before proceeding.
Introduction to Parts
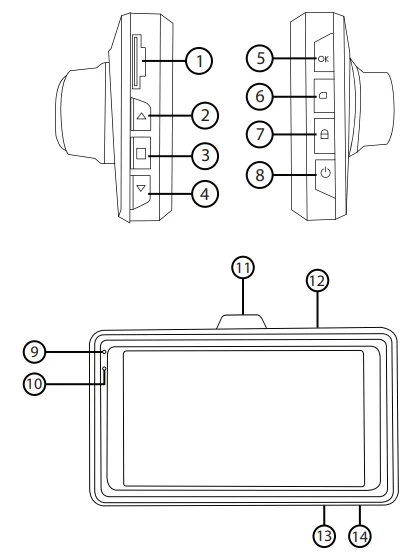
- MicroSD card slot
- Up button
- Menu button
- Down button
- OK button
- Mode selection button
- Lock button
- Power button
- Power indicator light (blue)
- Charging indicator light (red)
- Mounting bracket
- USB mini-B port
- Mic
- Reset button
Installation
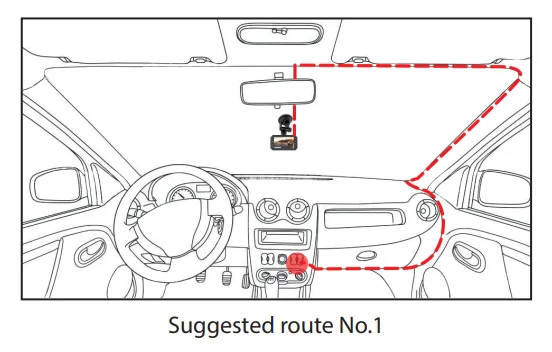
- Plan the route for the power cable before installing the Dashboard Camera. The diagram below is the suggested route.

- Clean the surface and the suction mount before installation.
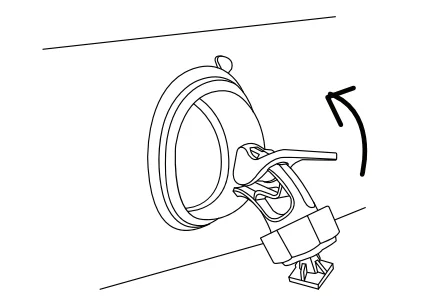
- Attach the suction mount to the surface, and flick the switch on the suction mount to tighten it.

- Insert the memory card into the MicroSD Card Slot to save the pictures and videos. Make sure a ‘click’ is heard when you insert the MicroSD Card Slot.
*Recommended to use a Class 10 microSD card with up to 32 GB capacity (Not included)
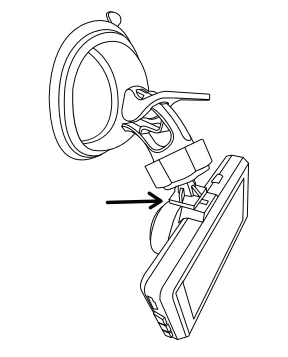
- Attach the Dashboard Camera to the suction mount using the mounting bracket at the top of the camera.

- Connect the power cable to power the camera and connect the car charger to the cigarette lighter socket of your car. The camera will automatically turn on and start recording.
- Long-press the power button to turn the camera on/off. Short-press to turn the display on/off.
Battery
The built-in battery is for temporary use only. To record videos, it is necessary to power the camera continuously via the car charger or USB Mini-B cable.
- Battery Indication Images

- There are three ways to charge the camera; the charging indication will flash when charging.

- Use the power adapter to charge.
- Use a PC USB port to charge.
- Use the vehicle’s power to charge.
- The red indicator light will illuminate when the camera is charging, and will automatically shut off when the charging is complete.
Description of Functions
G-sensor
- The G-sensor automatically protects and saves the ongoing video when the vehicle uncontrollably accelerates, prompting an accident.
Automatic On/Off
- When connected to the car charger, the camera automatically switches on when the car engine starts, turns off, and saves the last video when the car stops.
Video Record Mode
- Press the mode selection button and switch to the video mode. Click the OK button to start recording the video. A video camera icon will appear, flashing a red dot indicating that the video is being recorded.
Note:
The camera will also start recording automatically when it is connected to a power supply.
Photo Mode
- Press the mode selection button and switch to the camera mode. Press the OK button to take pictures.
Photo and Video Playback
Press the mode selection button and switch to the playback mode. The playback icon appears in the upper left corner of the screen.
- Press the up and down buttons to navigate and select files.
- Press the OK button to play/view the selected file.
Menu Settings for Video Mode
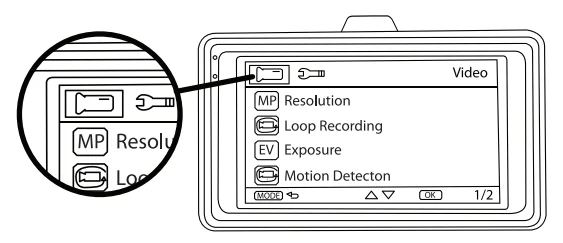
- When you are in the video mode, pressing the menu button will allow you to change settings specific to the video mode. There are two tabs in this setting.
- In the first tab, you can control the following parameters: Resolution – You can toggle between resolution pixels, 1920 x 1080, 1440 x 1080, 1280 x 720, 848 x 48,0, and 640 x 480.
- Loop Recording – This allows for continuous recording even if the MicroSD Card reaches full capacity. Older files are overwritten once the SD card reaches its file size limit. You can choose to turn it off or choose between 1, 2, 3, and 5 minutes of recording time.
- Exposure – It is the amount of light per unit area reaching a frame of the surface of an electronic image sensor. It basically controls the overall brightness of the recording. You can change the exposure between +2 to -2.
- Motion Detection – To turn on/off the motion detection. When this function is on, the camera will start recording when the camera detects a moving object in front of it.
- Date Stamp – To turn on/off the date stamp. If you turn it on, the date of recording will appear in your recorded videos.
- Record Audio – To turn on/off the audio recording. When the audio recording is off, the videos will be recorded without any audio.
- G-Sensor – This information can help paint the picture of events in the case of an incident, but can also trigger your car camera to respond appropriately. You can toggle the sensitivity of G Sensor values between off, 2G, 4G, and 8G.
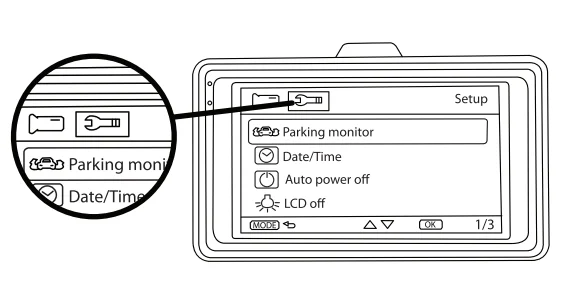
- Press the menu button again to the second tab to access the settings, such as:

- Press the menu button again to the second tab to access the settings, such as:
- Parking Monitor (Parking mode) – This function lets you record any incident that may occur when you have parked your car. When this function is on, it will turn on the camera and start recording the event automatically when certain forces are applied to your camera. You can toggle the sensitivity between off, 2G,,4G and 8G.
- Date/Time – To change the date and time.
- Auto Power Off – To change how long the camera will automatically power off. You can choose to turn it off or choose between 1 and 3 minutes.
- LCD Off – To turn the LCD off. You can choose to turn it off or choose between 3, 5, and 10 minutes to turn off after.
- Beep Sound – To turn on/off the beep sounds. When it’s turned on, you will hear a beeping sound when pressing the buttons of the camera.
- Language – You can choose to have the camera operate in these languages: English, Traditional and Simplified Chinese, French, Dutch, Korean, Italian, Portuguese, Russian, Spanish, and Thai.
- Frequency – This is the frequency of light. Light frequency is 50Hz in Europe, Africa, Australia Southern part of South America, Russia, and most of Asia, whereas it is 60Hz in North America, the northern part of South America, and Taiwan. If you find that videos recorded at night are glimmering, please adjust the light frequency according to your location.
- Format – To erase all the data and format the content of the MicroSD Card.
- Default Setting – To change all the settings of the camera back to its default parameters.
- Press the up and down buttons to navigate these settings and press the OK button to enter the specific setting.
- Press the mode button to exit the settings.
Menu Settings for Photo Mode
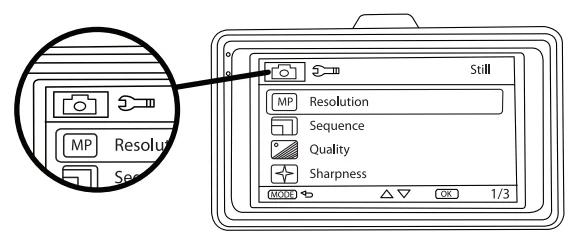
- When you are in the photo mode, pressing the menu button will allow you to change settings specific to the photo mode. There are two tabs in this setting.
- In the first tab, you can control the following parameters:
- Resolution – You can toggle between resolution pixels: 12M(4032 x 3024), 10M(3648 x 2736), 8M(3264 x 2448), 5M(2592 x 1944), 3M(2048 x 1536), 2MHD(1920 x 1080), 1.3M(1280 x 960) and VGA(640 x 480).
- Sequence – The dashcam will continuously shoot photos until you press the OK button.
- Quality – You can toggle between Fine, Normal, and Economy qualities of the photo taken.
- Sharpness – It refers to an image’s overall clarity in terms of both focus and contrast. You can choose between Strong, Norm, and Soft settings.
- White Balance – It is the process of removing unrealistic color casts, so that objects which appear white in person are rendered white in your photo. You can choose between Auto, Daylight, Cloudy, Tungsten, and Fluorescent settings.
- ISO – It is the light sensitivity rating of a digital image sensor. You can choose between Auto, 100, and 200 ISO settings.
- Exposure – It is the amount of light per unit area reaching a frame of the surface of an electronic image sensor. You can choose between the values of +2 and -2.
- Anti-Shaking – It compensates for unwanted movement of the camera, which would otherwise blur a photograph whilst shooting. You can choose to turn on/off.
- Quick Review – To review the picture as soon as you take it. You can choose to turn it off or choose between 2 and 5 seconds.
- Date Stamp – To turn on/off the date stamp. If you turn it on, the date of recording will appear in your recorded videos.
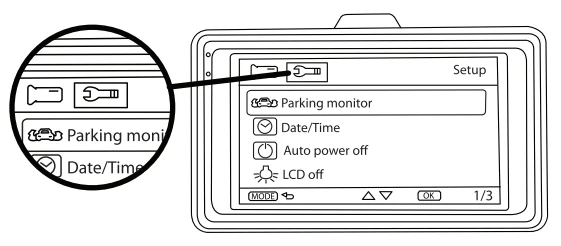
- Press the menu button again to the setup tab to access the settings such as Parking Monitor, Date/Time, Auto Power Off, LCD off, Beep Sound, Language, Frequency, Format, Default Setting, and Version.

- Press the up and down buttons to navigate these settings and press the OK button to enter the specific setting.
- Press the mode button to exit the settings.
- Press the menu button again to the setup tab to access the settings such as Parking Monitor, Date/Time, Auto Power Off, LCD off, Beep Sound, Language, Frequency, Format, Default Setting, and Version.
USB Mode
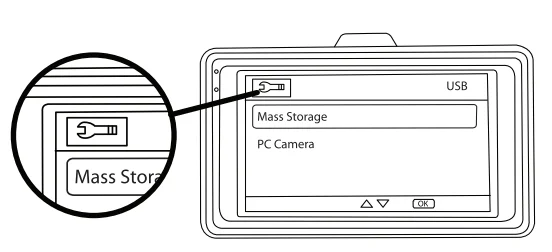
- Connect the camera to a computer using the included USB cable. Press the power button, and you will be greeted with the following options, as shown in the picture.
- The Mass Storage function allows you to access the recordings and photos of the MicroSD card.
- The PC Camera function allows you to use the Dashboard Camera as a webcam for your computer.
Reset
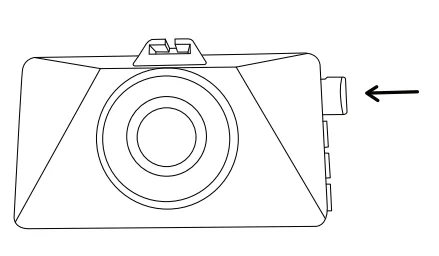
- You can reset the camera to its default settings by clicking the reset button at the bottom of the camera. Use a pin to access the reset button.
Troubleshooting
Unable to take photos and recordings.
- Check the MicroSD Card and make sure it has enough space and is unlocked.
“File Error” on replayed videos and photos.
- These are uncompleted files due to a MicroSD Card storage error. Use the formatting function on your computer to format the MicroSD Card.
Clouded or blurry videos.
- Clear the camera lens with lens paper and remove any dirt and fingerprints on it.
Dark images when recording.
- Scenes with bigger contrast, like water scenes and the sky, affect the automatic exposure function of the camera. To correct this, adjust “EV” in the settings.
The imperfect color saturation occurs on an overcast day and in indoor light.
- Set the “White Balance” function to automatic.
Specification
- Power Input: DC 5V 1A
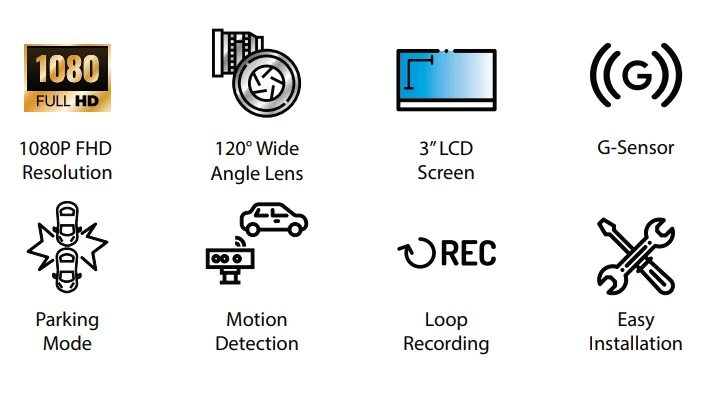
- Lens: 120° Wide-angle lens
- Display: 3.0″ LTPS LCD
- Loop Recording : 1 / 2 / 3 / 5 mins
- Resolution : 1920 x 1080 / 1440 x 1080 / 1280 x 720 / 848 x 480 / 640 x 480
- G-Sensor: Yes
- Motion Detection: Yes
- Parking Mode Yes
- MicroSD Card: Supports up to 32 GB
- File Format: AVI / JPG
- Built-in Battery: 200 mAh
*Specifications are subject to change without notice or obligation.
For more information and inquiries, please reach out to: [email protected]
For more manuals by Dartwood, visit ManualsLibraryy
Dartwood FHD 1080P Dashboard Cam- FAQs
Is 1080p resolution good for a dash cam?
Yes, 1080p (Full HD) provides clear video that’s sufficient for most driving situations, capturing license plates, road signs, and incidents clearly.
How long can a 1080p dash cam record?
With a 256GB memory card, a 1080p dash cam can store 30–40 hours of footage. Higher resolution or larger storage increases recording time accordingly.
Should I get a 1080p or 4K dash cam?
1080p is ideal for basic driving documentation. For extra detail, such as reading license plates from a distance, a 2K or 4K dash cam is better, but files will take up more storage.
Where should I place my dash cam?
Mount it behind the rearview mirror for a clear view of the road without blocking your line of sight. Ensure it faces straight and unobstructed.
Can a dash cam record all the time?
Yes, dash cams with Parking Mode or hardwired connections can record even when the car is off. Otherwise, they operate only when the ignition is on.
Do dash cams record audio?
Most dash cams, including the Dartwood FHD 1080P, record audio along with video, but check your device settings to enable or disable audio recording.
Does a dash cam drain the car battery?
In normal use, no. Dash cams powered through the cigarette lighter typically turn off with the ignition. Hardwired dash cams with constant power may slightly drain the battery if left unused for long periods.
Can I connect the dash cam to my phone without Wi-Fi?
Yes, using a USB cable compatible with both your dash cam and smartphone, you can transfer footage directly without Wi-Fi.

